Don't code but automate with N8N
• 7 minute read
n8n, automation, postgresql, api
Table of contents
I recently explained how you can run Rundeck and execute jobs on Kubernetes. Yet, some people came to me asking if there is a lighter solution with a more coherent approach to creating workflows. I understand them. Rundeck has too many features, and I think it's not user-friendly for beginners. If I had to imagine a low-code platform I would use to work on, N8N seems closer to what I expect to use as a user. Let's see some practical scenarios.
Sample project with a configured N8N
Just download this project and execute the following command:
docker-compose up appUse admin for user and password to access the panels:
- N8N:
http://localhost:5678. - Django ADMIN:
http://localhost:8080/admin.
This project has some features, so we can use them through N8N workflows. During startup, it creates:
- A database with a table. We can use the user
role_tmp_prdto connect to it. Check out this file for more details. - The endpoint
/api/v1/auditto save records. - The endpoint
/api/v1/queuesto retrieve generated queue metrics. It mimics the one available on RabbitMQ Management HTTP API.
You can import the workflows in this folder. However, remember to configure the credentials for the database and the API.
N8N playground
Let's make some fake business rules to craft the workflows we need. The rules do not make sense, but they are essential to design the flows. For the first workflow:
- Save the purchase event in the database with the tag ACME if it has a price higher than 100.
- Save the purchase event in the database with the tag XYZ if it has a price less than or equal to 100.
- Dispatch the details of the transaction to an API.
- Save the record to the database.
For the second to last workflow:
- Every 5 minutes, execute the flow.
- Retrieve all the queue states from the broker.
- The queue is eligible for the notification message if the consumer number is less than 50.
- The queue is eligible for the notification message if the message number exceeds 10000.
- Send the qualified data to an API.
The last one:
- Every hour, execute the flow.
- Consult the table
tmp_random_table, retrieving the records over the previous 1 hour. - If there are 5 records of type abandoned carts, call an API informing the circumstance.
These three flows need a correlation ID as the API requires it. We'll generate it as UUID version 4 from JavaScript code.
Purchase webhook
Take a look at the workflow:
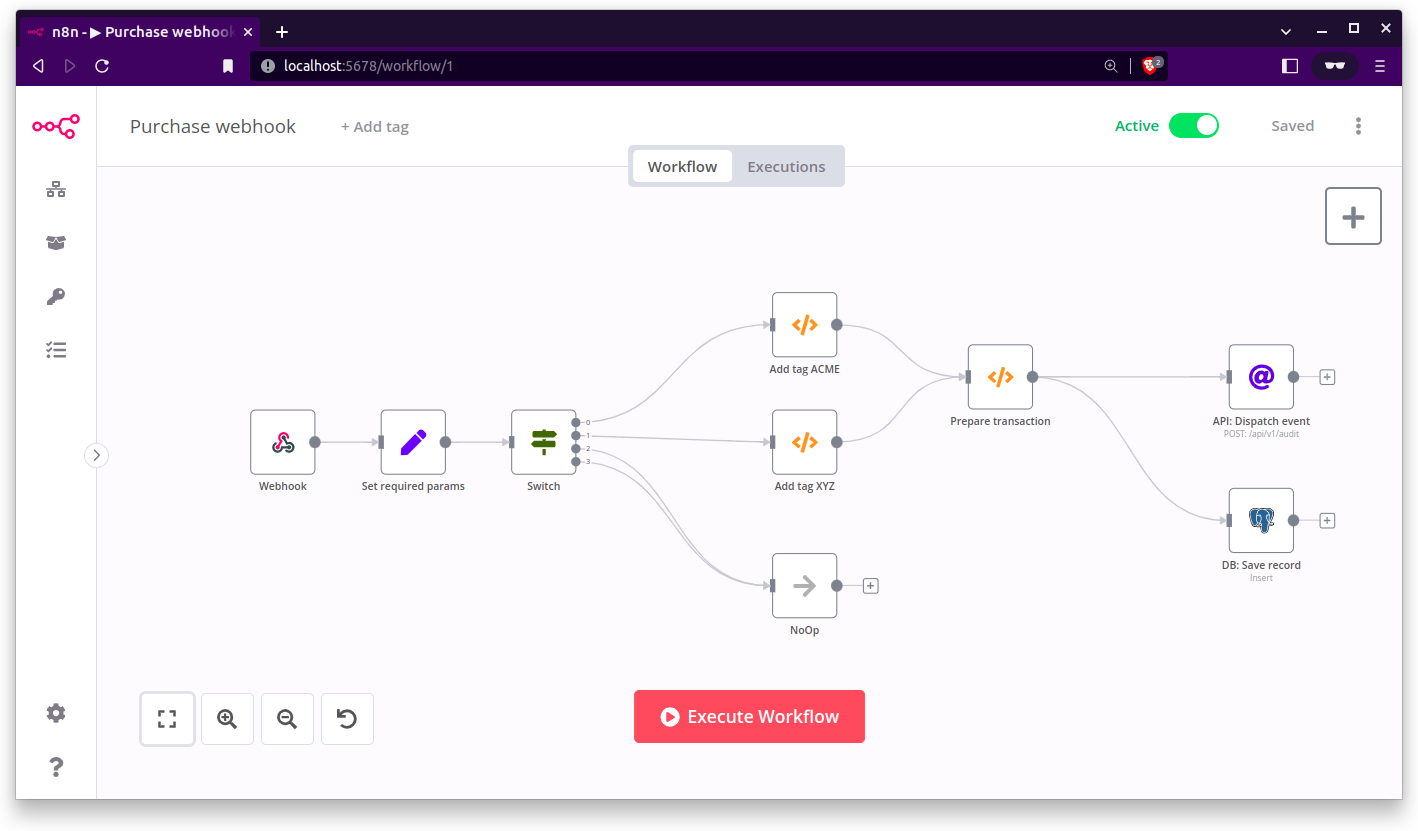
At the upper right of the image, you can see it's active. If you call the production URL, it will do its job. If you open the Webhook node, that's what you'll see:
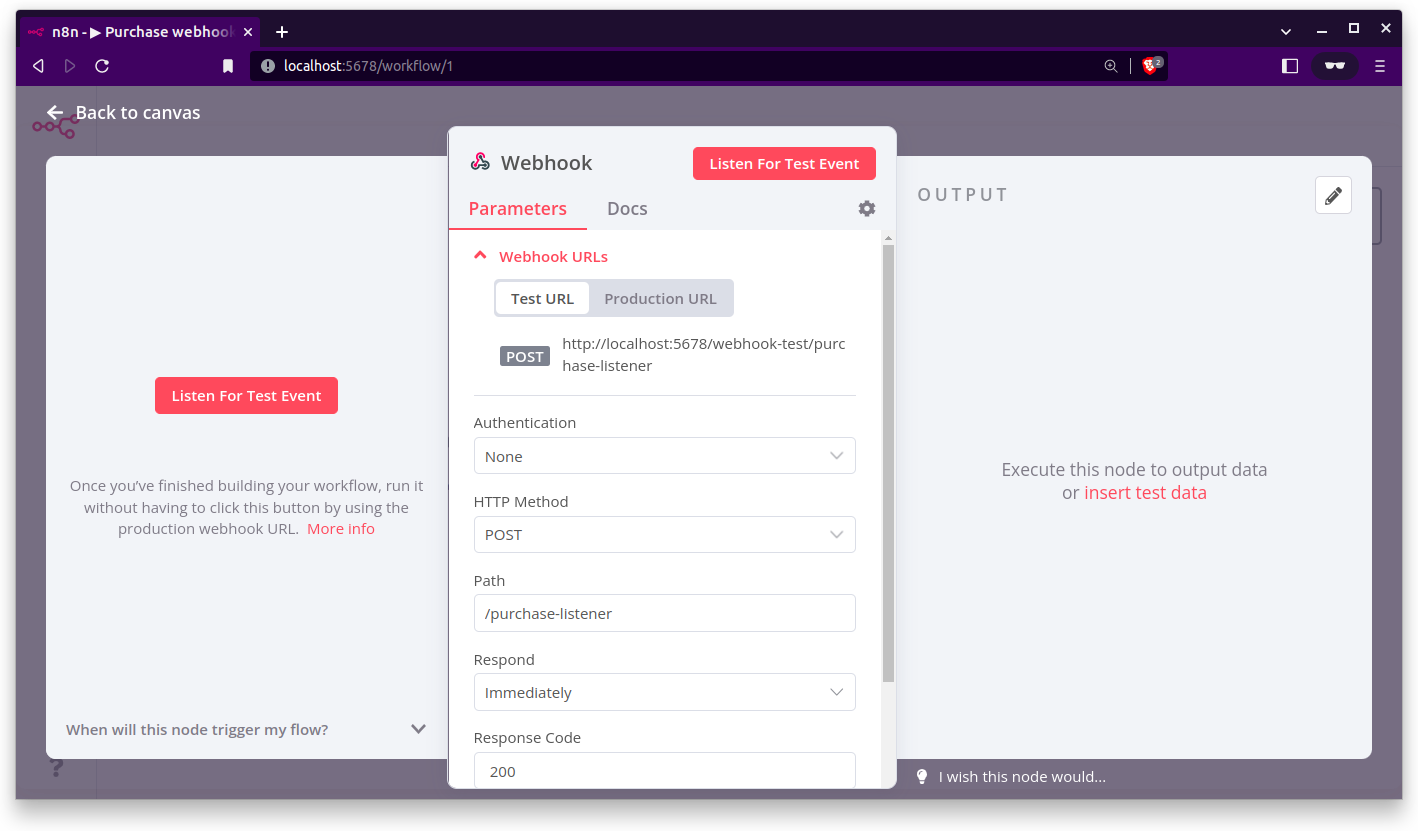
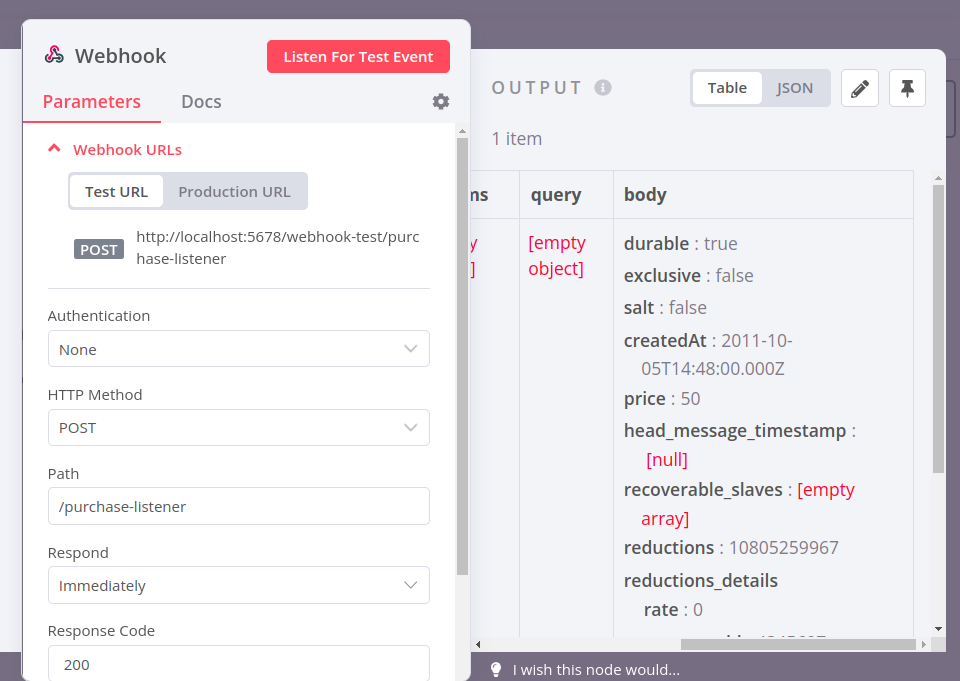
To test it, you can click on Listen For Test Event and use the Test URL to send the request. For example, to emulate the purchase event, we can execute the following in the terminal:
curl --location --request POST 'http://localhost:5678/webhook-test/purchase-listener' \
--header 'Content-Type: application/json' \
--data-raw '{
  "durable": true,
  "exclusive": false,
  "salt": false,
  "createdAt": "2011-10-05T14:48:00.000Z",
  "price": 50,
  "head_message_timestamp": null,
  "recoverable_slaves": [],
  "reductions": 10805259967,
  "reductions_details": {
    "rate": 0,
    "next_seq_id": 4345697
  },
  "synchronised": ["Jafar", "Iago"],
  "where": "Agrabah"
}
'
Right after executing it, you'll see it has an output with the webhook output:
If you close it, you'll see how the data navigated through the flow by looking at the green lines:
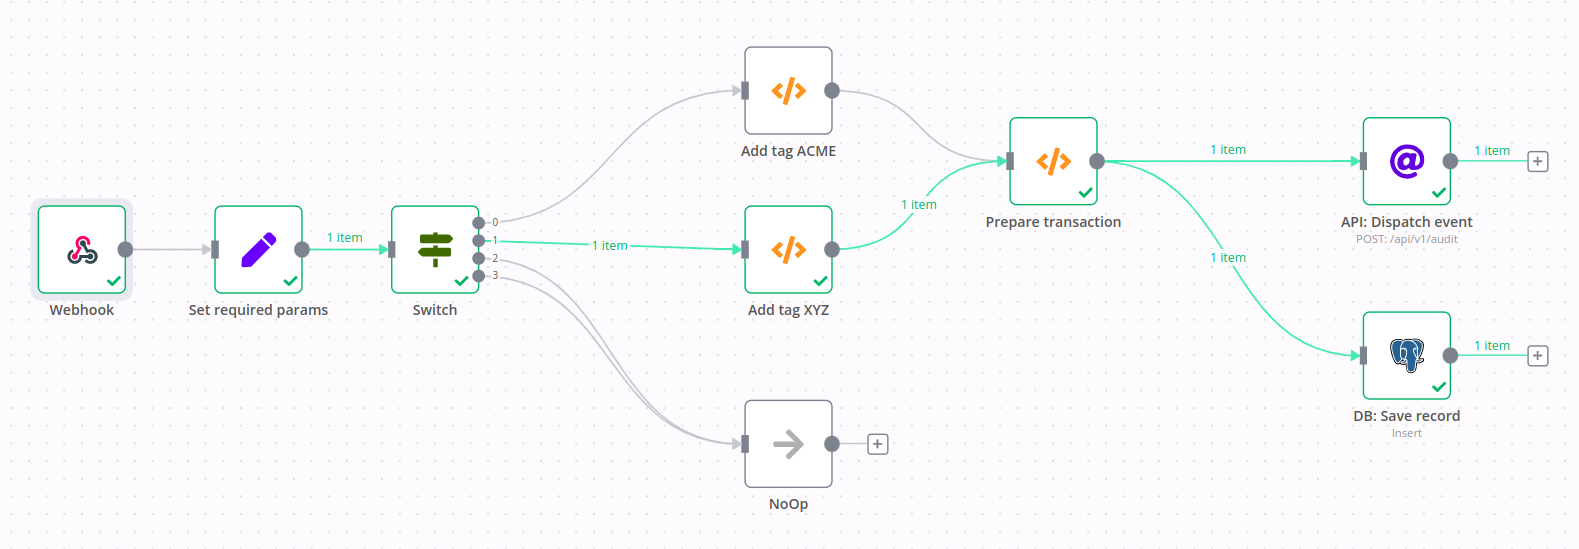
Moreover, if you click on each node, you can check what it received and sent to other nodes. For example, let's see the node Add tag XYZ:
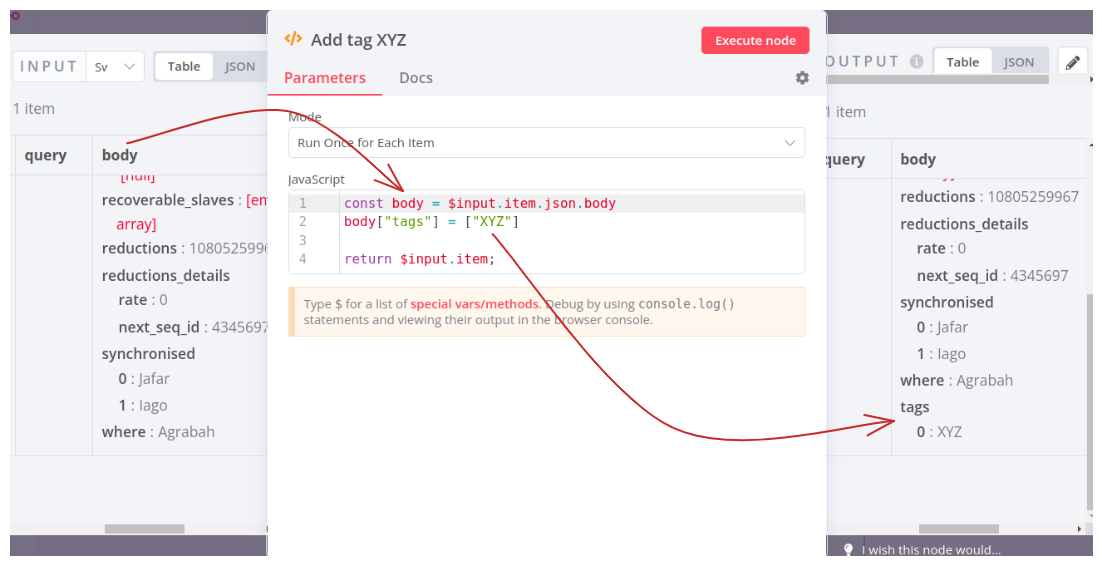
If you open the Prepare transaction node, you can see we are creating the transaction ID using the uuid module. To enable that, the variable NODE_FUNCTION_ALLOW_EXTERNAL must have the value uuid. You can add more by adding more modules, followed by a comma.
Another important thing is the Postgres node. The insert operation expects the following parameters through its input:
- correlation_id.
- message.
- metadata.
That's why the previous Code node has this part in its implementation:
$input.item.json.correlation_id = transactionId
$input.item.json.message = 'purchase'
$input.item.json.metadata = body
Queue sniffer
This is the workflow that checks the queue statistics:

Let's describe some nodes 😃. The Schedule Trigger node is configured to run every 5 minutes with the cron ***/5 * * * ***. The node, right after it, makes an HTTP request to get all the queue statistics. This request requires a basic HTTP authentication. See where it's configured and its output after its execution:
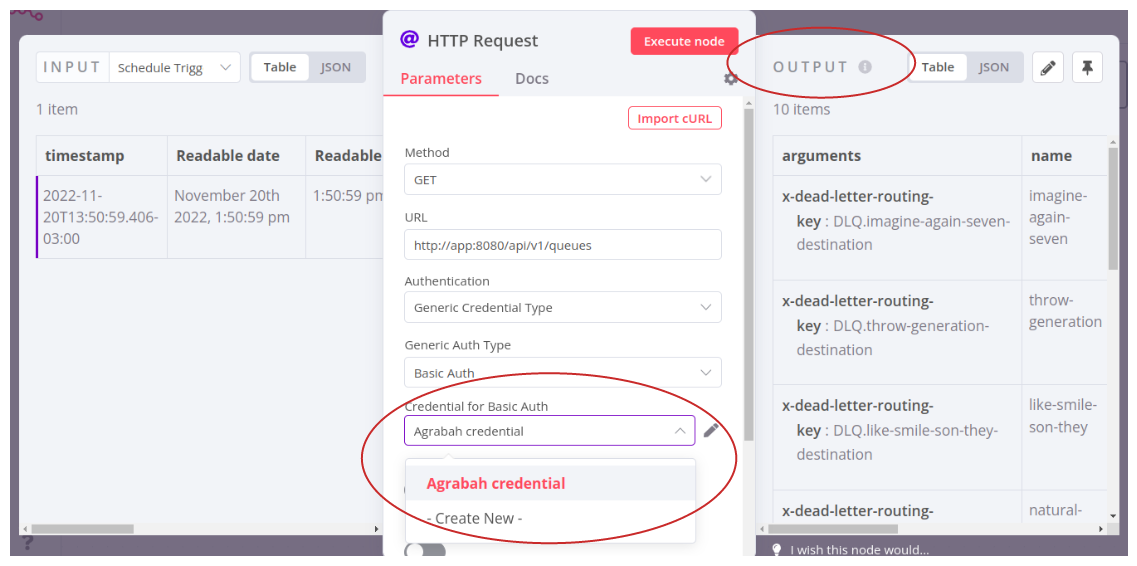
After that, a code checks if each queue statistic is eligible for the next step according to the defined business rules:
const items = $input.all()

const filteredItems = []
for (const { json: queueStatistics } of items) {
  console.log(`Queue being evaluated: ${queueStatistics.name}`)
  const currentNumberOfConsumers = queueStatistics.consumers
  const currentNumberOfMessages = queueStatistics.messages
  const isEligible = currentNumberOfConsumers < 50 || currentNumberOfMessages > 100_000
  if (isEligible) {
    filteredItems.push(queueStatistics)
  }
}

return filteredItems
While testing the code above, it's possible getting the result of console.log through the browser, which is handy for debugging purposes.
The next node prepares the data to be sent to our API:
const uuid = require("uuid")
const transactionId = uuid.v4()
console.log(`Generated transaction ID: ${transactionId}`)

const items = $input.all()

const bodies = []
for (const { json: filteredQueueStatistics } of items) {
  const body = {
    correlation_id: transactionId,
    action: "alarm",
    metadata: filteredQueueStatistics,
  }
  bodies.push(body)
}

return bodies
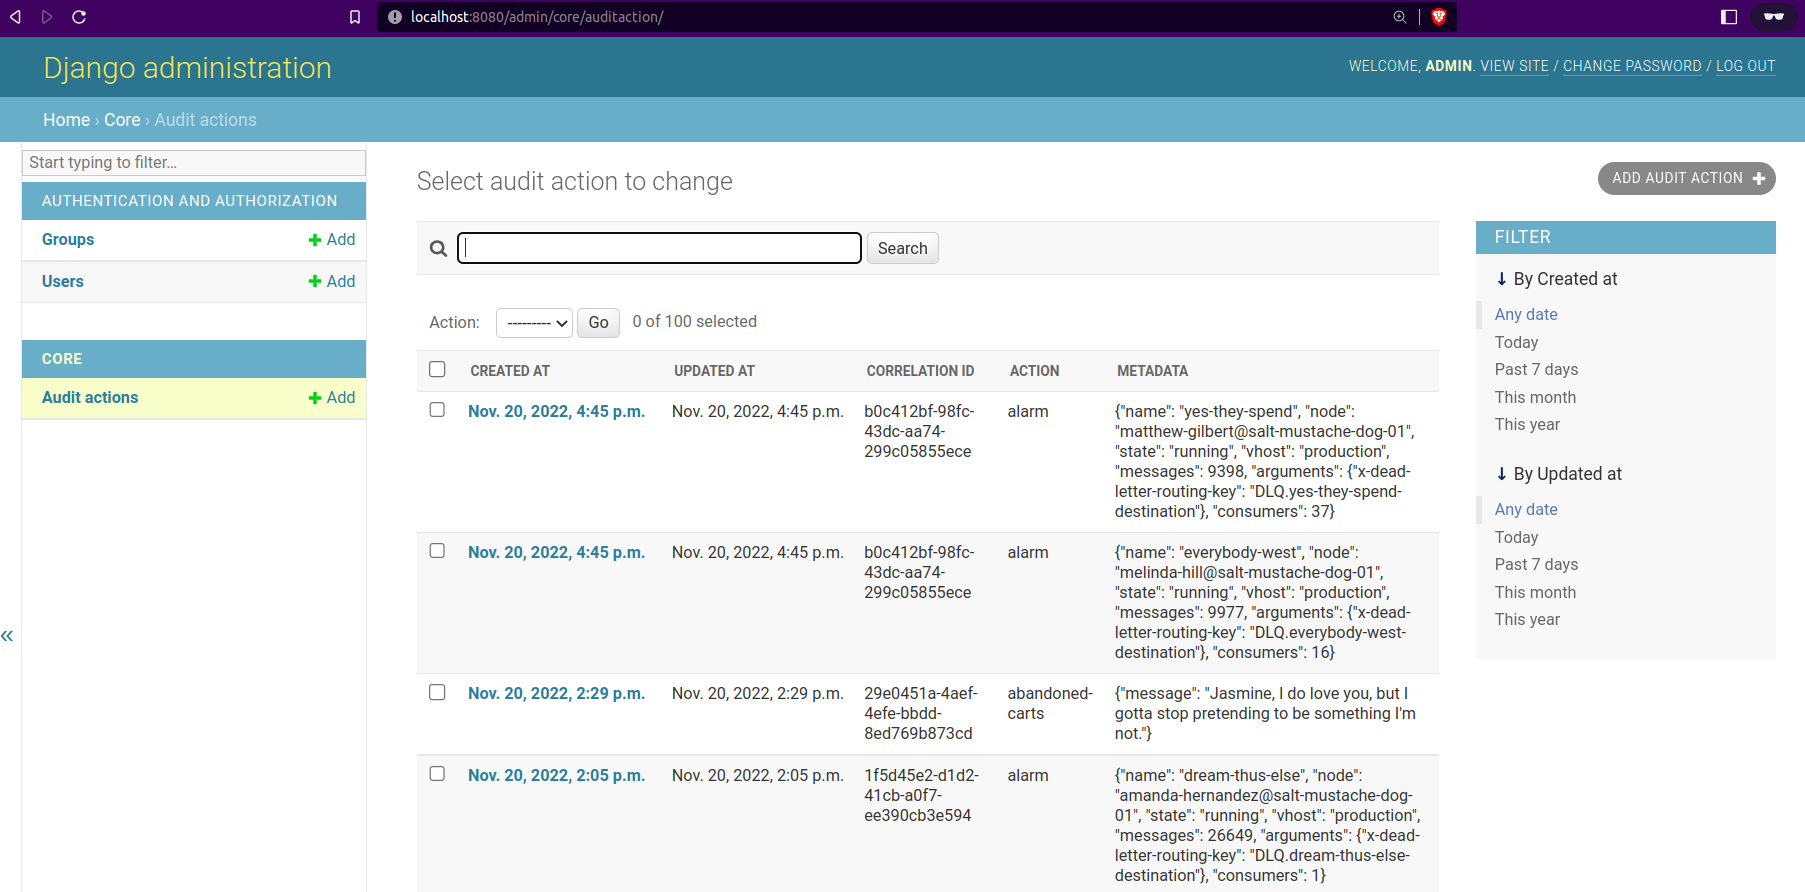
Leaving it running for a time during my tests, that's what I can see on Django Admin:
Abandoned carts
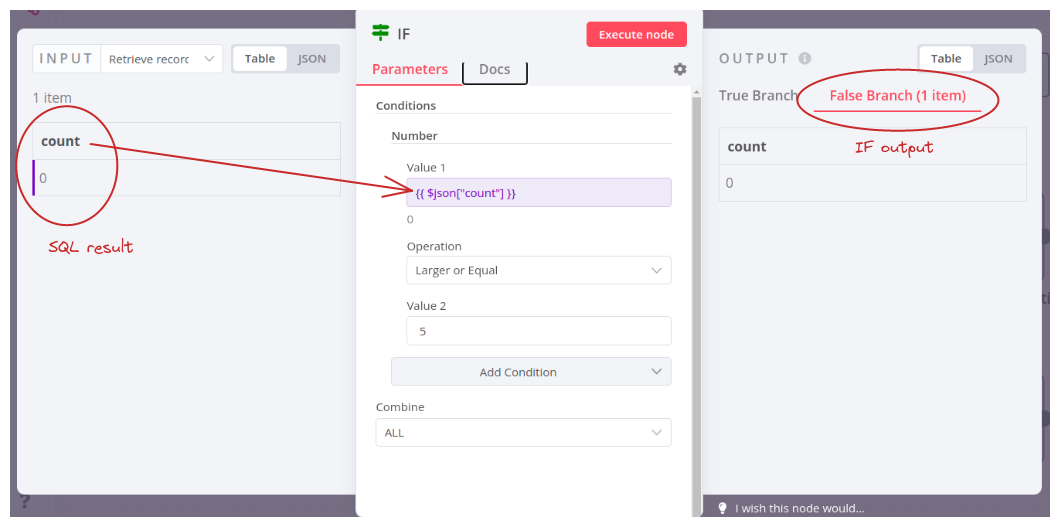
This also has a trigger by a CRON expression. The difference is that the database provides the data to be evaluated:
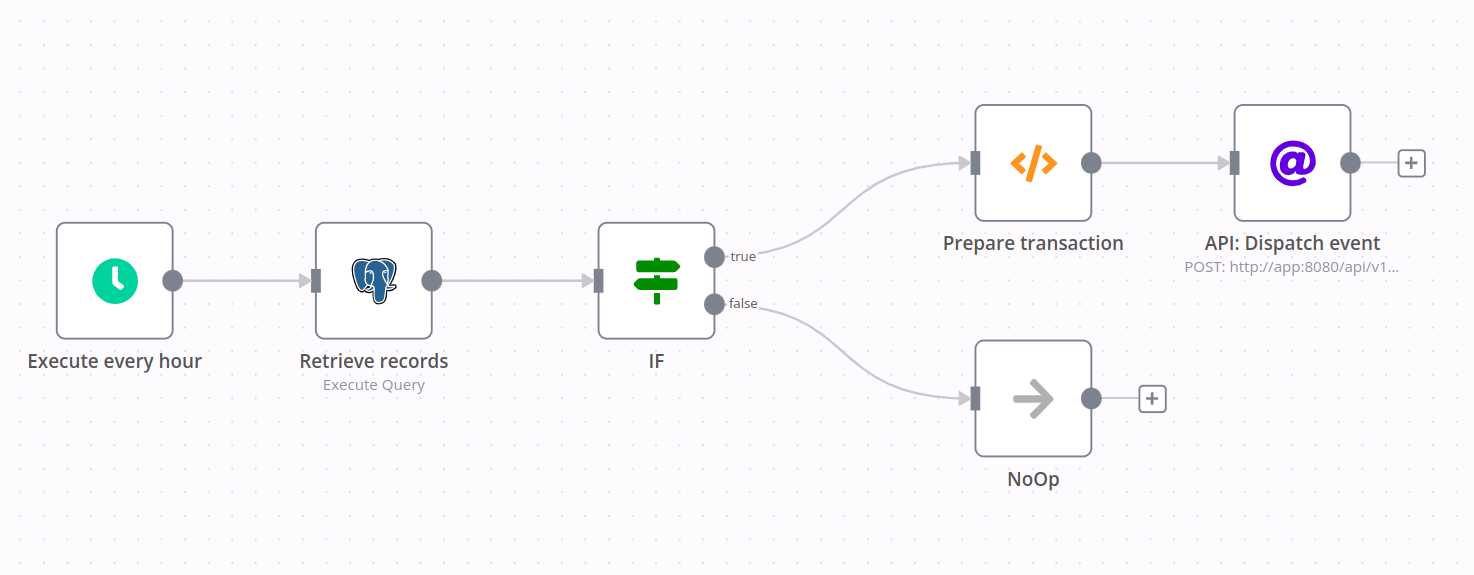
This is the DQL:
SELECT COUNT(*)
FROM tmp_random_table
WHERE created_at BETWEEN NOW() - INTERVAL '1 HOUR' AND NOW();
The IF node checks if the returned value from the previous node is greater or equal to 5. The image below illustrates a false result:
The rest of the nodes follow the same pattern as the previous workflows.
Conclusion
N8N is easy and pretty straightforward, even for critical topics, such as dealing with errors or how to monitor workflow errors. They are well-covered 😍.
Now, why build a conventional backend solution if we can use N8N? That question appeared to me when I created my first workflow. It's easy to create a prototype or even proof of concept projects. However, as the integration evolves and more complicated scenarios are demanded, this may be the moment to move to a more professional solution. By the way, the only thing that concerns me is the quality of the projects. How do we test complex scenarios without breaking what exists? There are some approaches, but something still needs to be better defined.
See everything we did here on GitHub.
Posted listening to Come Anytime, Hoodoo Gurus 🎶.